

HELLO ARTISTS! I am so excited to share another guest artist post with you. When I saw the new ArtFoamies a few months ago, I not only knew I wanted the “twig” stamp, but I also knew exactly what I wanted to do with it!
I don’t know about you, but I enjoy sending mail just as much as I love seeing a hand-addressed envelope in my mailbox. However, I just can’t send store-bought cards. I think I’ve created homemade cards most of my life. My cards have evolved from crayons and markers to rubber stamping and now I love sending small works of art. The art becomes a gift, and the recipient can choose to frame or display their card if they want! With my stash getting low and a couple birthdays approaching, I grabbed my ArtFoamies to begin.


Once the book text was dry, I applied gesso again. This time, around the edges of the ephemera and other random other places at full strength and watered down. I also splattered it! I love how gesso interacts with old papers. Adding the gesso embeds the text and provides another layer of interest.

After the gesso was dry, I grabbed the “twig” and stamped it with sepia India ink. I used a small gel plate as my stamp pad and palette throughout the entire process.


While the sepia ink dried, I also stamped a twig on each envelope for my art cards along with, of course, some splatters.


https://youtu.be/Je7WSQHVZd8


I am so excited to send these cards. In fact, I already sent two of them! To add a message on the cards, I simply used some washi tape and a piece of printer paper.

However, I can only send 5, because I did not add the blue cardstock to one of the cards!
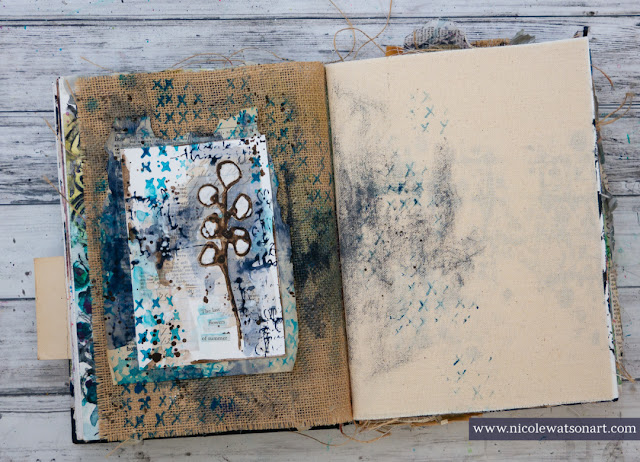
Since I liked my small works of art so much, I decided to stick one in my art journal! I opened to a burlap page in my Dina Wakley journal, and I played a bit with some of the off-stamp images (you can see me create these in the video above). In the end I decided to grab that dictionary page I used for masking to layer behind my piece of art.
One thing I’ve learned in creating is to stamp off my images, and save any bits of paper or masking paper to use for future projects. These unplanned papers are always the best to create with!
I stuck the dictionary page down, added some more foam Right Here stamped images on the burlap. ArtFoamies stamp so amazingly well on burlap. Then, topped the pages off with some Payne’s Gray and some sepia splatters. The final step was to adhere my art card and then I added a small sticker that said “the last flowers of summer.” The twig image reminded me so much of the brown, tired flowers from summer in my garden.

Check out the Part 2 video to see the simple process of creating a journal page with one of the art cards here:
https://youtu.be/JxQArmQ_ftY
I hope this inspires you to create some small works of art to mail. I’d love to see your creations with your ArtFoamies inspired by my technique. All the supplies are linked in my videos if you’d like to use the same index cards. When you do, tag me on Instagram so I can see your amazing art (@nicolewatsonart).
-Nicole
http://nicolewatsonart.com

So beautiful, stunning colors and I’m all time favorite stamp. Thank you for sharing
ReplyDelete