
HEY LOOK! I MADE A SUPER COLORFUL UPCYCLED JOURNAL COVER!
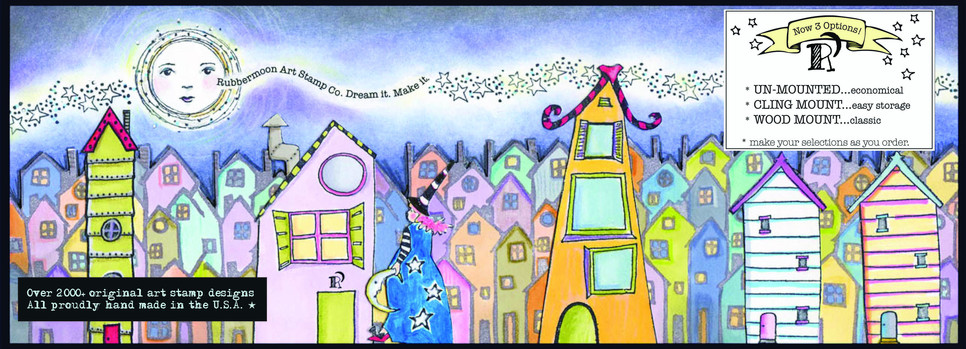
with Stencils & RubberMoon Art Stamps!!
Hi, it's me, Kae Pea from RubberMoon Art Stamps! I am SO OVER THE MOON excited to be here hopping with all of these fantastic artists from the StencilGirl Creative Team. AND so happy, too, that you are here joining in the fun!I am really thrilled that we could come together to make projects using my stencil designs and RubberMoon Art Stamps to create and share all of this artsy goodness! How is that for winning combination? Pretty darn good if you ask me! But then I DO love all things paper art-ish!! How about you? Well, of course you do. That is why you are here!! Soooo anyway...
I know I had a blast creating this journal and I am hoping that it will inspire you to make one of your own. I hope you are so inspired that you can barely wait to run to your creative spot and break out your stamps and stencils!! Oh but wait...PLEASE DO finish hopping and make sure to leave lots of lovely comments so you can be entered to WIN a set of kae pea stencils from StencilGirl and a $20.00 gift certificate from RubberMoon Art Stamps. (Yeah baby...seriously good stuff!)
And now without further delay, here is my new journal to bring in the New Year...
This is just a pre-made journal I purchased at a craft store....the cover was not "me" and it was sorta flimsy so I decided to give it a make over!
 |
BEFORE I got my hands on it with stencil and stamps! |
1) a store bought journal (with a flimsy, ugly cover!)
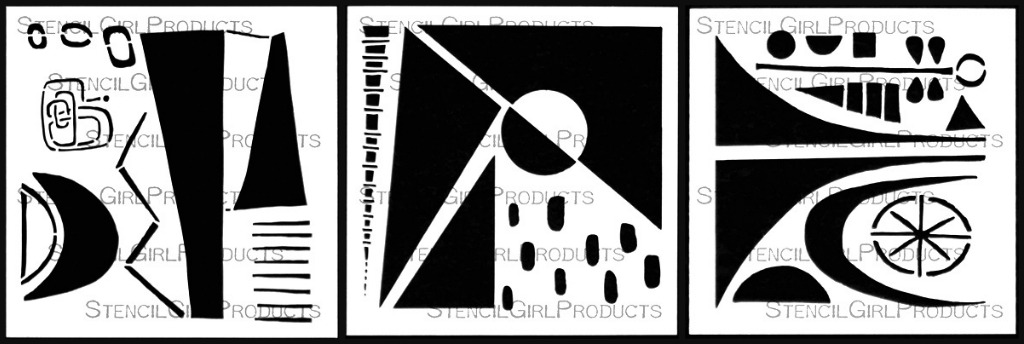
2) Celestial Grove Stencil
3) rubber stamps from RubberMoon
* stamps used: mk9197f-moon face kp5152h-ink splatter kp5129d-zen garden mk169aa-itty heart
4) assorted acrylic craft paints in neon rainbow colors
5) white gesso
6) white glue (I use ppa or pva)
7) black acrylic spray paint
8) paintbrushes
9) The Ultimate Red Rubber Palette ( there are many uses for this but for this project I simply used it as a palette and as a "stamp pad")
10) baby wipes (not pictured)
11) permanent black inpad
 | ||
| Here are the products and stuff I used |
 |
| spray black & a little green through stencil onto a piece of white paper |
 |
| glue that snazzy paper onto the cover of your journal |
 |
| trim away the edges if it overhangs |
 |
| ooh rainbow colors on the rubber palette |
 | ||||
| brush on your purdy neon rainbow colors |
 | |
| wipe and blend with a baby wipe this will wipe off the paint from over the black |
 |
| continue painting, blending and wiping all the puuurdy colors! |
 |
| spread out some gesso very thin on your red rubber palette & use it as your "stamp pad"... cool huh? |
 |
| stamp the border with white gesso and this cool zen garden stamp |
 | ||
| stamp the face in the open "moon" area with black perm ink |
 | |
| paint and add depth to the face (i used all the same colors that I used for the background) |
 | |
| VOILA! A new journal for a New Year! |
Before you leave, be sure to enter the stencil giveaway!!
One lucky winner will receive these 6” x 6” StencilGirl Midcentury Modern Elements designed by Kae Pea...
One lucky winner will receive these 6” x 6” StencilGirl Midcentury Modern Elements designed by Kae Pea...
And a $20 GIFT CERTIFICATE from RubberMoon Art Stamps!
All you have to do is leave a comment below (hopefully something nice!!)
by Friday, January 10th at 11:59PM Central Time.
The more blogs you comment on in the blog hop, the more chances you have of winning!
Thank you and GOOD LUCK! by Friday, January 10th at 11:59PM Central Time.
The more blogs you comment on in the blog hop, the more chances you have of winning!
StencilGirl Talk
RubberMoon (kae pea) <----- you are here
Mary Beth Shaw
Janet Joehlin
Corrine Gilman
Kirsten Reed
Mary C. Nasser
Linda Kittmer
Julie Snidel
Leslie Tucker Jenison
Maria McGuire
Thank you for sharing. I have a new journal for 2014 and it needs a cover. This give me ideas for completing that task.
ReplyDeleteooh, now I know how to play with my rubber pad. Great way to bling up the ordinary. xox
ReplyDeletelike this so much i checked out the rubber moon site…lots of stamps there i would love to have. thanks for the opportunity!
ReplyDeleteGreat cover idea! I can't get enough of Rubber moon! P.S.....Pick Me!
ReplyDeleteI love the Celestial Grove stencil! Your journal cover turned out fantastic!
ReplyDeleteLove your tutorials. Great inspiration for the uninspired!
ReplyDeleteYou are so talented with a lovely sense of play. I .
ReplyDeletewish Stencil Girl stencils were available where I live
This cover is amazing! But then I love everything moon related. Thanks. First time on your site. I will be back...
ReplyDeletegreat idea - I love the ready made journals...but not those covers!
ReplyDeleteI think this would also work well for the top of a cigar box.
This book cover is wonderful! I love the tree stencil! Too cool!
ReplyDeleteThis page is so beautiful.
ReplyDeletestencils and stamps, just like bread and butter. Great page and tutorial! thanks
ReplyDeleteThis is so beautiful...and I just picked up a new journal yesterday! Thanks for the inspiration Kristen.
ReplyDeleteBeautiful cover and colors. Thanks so much for hopping with us today!
ReplyDeleteNow that is an AWESOME stencil!
ReplyDeleteI have a couple of those very same "ugly" journals. Can't wait to get started on their covers now!
ReplyDeleteLOVE this project KP!
ReplyDeleteKeep the creativity going! I may get some art done yet! :)
ReplyDeleteLively and lovely colors! Great composition and transformation. Thank you for sharing :)
ReplyDeleteHow very exciting!! The cover is fun and colorful. I love it. Winning your stencils and a gift certificate would be great!!!! Thanks for the tutorial.
ReplyDeleteWow, I'm motivated now - love the transformation and love your instructions!
ReplyDeleteWhat a transformation, KP. I love those stamps and your stencil. Just beautiful colors.
ReplyDeleteBright and joyful, just what is needed for the new year.
ReplyDeleteoooh I am loving the zen garden at the foot of the night forest!!! Gorgeous!!
ReplyDeleteI love what you've done with your journal cover!
ReplyDeleteThanks for showing us how!!
Just "shared" this. I think that this project is one beautiful look not so expensive, but looks like a million bucks!
ReplyDeleteLove what you did with the cover :) I love working in those art journals but the covers are always so boring. I have a couple that still need prettied up so thanks for the ides ♥
ReplyDeleteHi Kristen! Great stencil and great journal cover makeover! and congratulations on Rubber Moon Website launch! xo!
ReplyDeleteHi. I just love your stencils. I have the stencil you used for your hop piece above and will use your inspiration to make my own. Thank You. your art, stencils and inspiration are all amazing. Thanks.
ReplyDeleteAn amazing cover, Kristen! Love it! :)
ReplyDeleteCelestial Grove is perfect for that cover and I LOVE the colours you've used. Am off to check out Rubber Moon.
ReplyDeleteLove your stencils! I have been following the blog hop. It is so inspiring. Thanks for the giveaway!
ReplyDeleteThank you - a lot of information for, shall we say, a veteran stamper who is excited to learn about new products and techniques. Very helpful and inspiring. xo
ReplyDeleteLove your journal cover! A blog with the word "moon" in it can't be all bad, lol, he, he.
ReplyDeleteOh my goodness! Gorgeous!!
ReplyDeleteSo pretty! Especially love that cute little zen garden stamp ...
ReplyDeleteI love the Angel Grove stencil. I can see so many ways to use it for my greeting cards as well as mixed media. Great job.
ReplyDeleteWow! Love all the bright colors!
ReplyDeleteWhat a great stencil. A MUST have!
ReplyDeleteQuite a journal cover makeover.
ReplyDeleteWow- What a totally cool makeover Kae! Thank you so much for sharing your steps and inspiration- can't wait to check out your stamps! ")
ReplyDeleteI love your work and stencils. I think we can all learn from each other. I'd love to learn more about layering stencils and using stamps with a Gelli plate. Thanks!
ReplyDeleteThis journal project wouod be great for sprucing up my sketch pads and kiln logs. =) What I personally would love to see, is a demonstration of someone using these stencils/stamps in a nontraditional manner. Like in ceramics. I for one would LOVE to write that review/tutorial for you. =) glad I found this blog hop through Mary C. Nasser's blog!
ReplyDeleteShawna
Jsbarts.blogspot.com
I would love to see a demonstration of using the stencils on a Gelli Arts Printing Plate.
ReplyDeleteanother riveting and inspirational project Miss Kae Pea!!!! Love it, love you! xoxoxo
ReplyDeleteI really love the journal!
ReplyDeleteFabulous!
ReplyDeleteI absolutely ADORE your journal cover!!
ReplyDeleteAnd I love, love, love your StencilGirl stencils and Rubbermoon stamps! So glad we are friends!! :)
Love the colors, the stamps, aw heck love all of it! Happy new year!
ReplyDeleteI am amazed at how many things I learn here. I had never heard of a red rubber palette. Now next time I order stencils, I will order one. I spent $60 here today so have to wait a bit for more fun and stencils.
ReplyDeleteDelightful, of course. I love all the uses for the red rubber palette. I love the spray paint through the stencil, too!
ReplyDeleteLove the fact that you used the cover that came with the journal and just made it your own.
ReplyDeleteAwesome cover! Love the stencil you used and the gorgeous colors!
ReplyDeleteI love what you have done with the cover. You've taken it from ordinary to extraordinary! That stencil is awesome too!
ReplyDeleteCheers
Sharon Ling
Thanks for such a detailed tutorial. I love the cover and now want to go play with paint and stencils. Please enter me in giveaway so I have no excuse to not play.
ReplyDeleteI love that stencil!!! And your use of all that paint and the face stamp.
ReplyDeleteWhat inspiration!! Thanks! The journal cover is marvelous! Thanks for the step-by-step...you make it look so easy! And thanks for your kind giveaway!
ReplyDeleteoh yes Please & Thank you. I want to touch your new cover it is so full of life
ReplyDeleteArtistPoet dot Girl @gmail dot com
Great tutorial and fantastic journal cover! Love the colors!
ReplyDeleteKae Pea, you NEVER fail to delight and amaze me! luv, luv, luv :)
ReplyDeleteunbelievable!! u are so full of talent, tx for sharing, aloha, angi in hana
ReplyDeleteI love the idea of taking a blah looking journal cove and making it mine!
ReplyDeleteLove the cover and your use of the face stamp.
ReplyDeleteBeautiful cover! I am inspired to try one. Thanks for the tutorial.
ReplyDeleteLove it, and love seeing your process. I've never seen the red rubber sheet before - interesting!
ReplyDeleteI absolutely love this stencil and the way you used it. I have the stencil and I need to cover a journal so I think I'll try some of your tricks. I also have lots of Rubbermoon stamps. Love them as well.
ReplyDeleteI love what you did on the cover for your journal. I love seeing your process and the list of supplies. Thanks for the tutorial!
ReplyDeleteYour cover is awesome!!! I even have that stencil! The rainbow colors are yummy.
ReplyDelete....Raine
I have a large collection of rubber moon stamps that are favorites. Thanks for the inspiration!
ReplyDeleteI feel kind of foolish saying this...but as I was going through your directions on this piece I had the Jaws piece going through my mind (you know, when the shark comes to attack someone...dada dada dadadada. My feet wanted to carry me into the craft area. You so inspired me. I love both the stamp and stencil and talk about beautiful, fun colors! Thanks so much for sharing with us and I have a craft room that's calling...oh, but first I'll have to check the shop! Thanks again!
ReplyDeleteOh my goodness,my his is just gorgeous! Your step-by-step instructions make this sound very do-able! I love my mounted Arab stamps, and am thrilled to find inspiration on your blog. Thank you!
ReplyDeleteSorry, auto-correct took over. I love my RB stamps!!!
DeleteSuper idea! Great colors,too!
ReplyDeletehow beautiful! loved your stencil, colors you used--loved it all. thanks for the tutorial!
ReplyDeleteLove this stencil. Your journal is beautiful. Thanks for the step by step.
ReplyDeleteis a fantastic cover, and the tutorial amazing, love this stunning stencil, I want it!!!
ReplyDeleteBeautiful work!
ReplyDeleteLove what you did--so inspiring and your tutorial very generous. Thank you!
ReplyDeleteOhh myyyy goodness (holding my breath), wow! Creating 'a cover' for any journal is extremely intimidating....ohh the stress of it turning into what you are trying to 'project your style'. Wondermous job Miss Kae!
ReplyDeleteHey Kae Pea, I just love your cover. It sings of Rubber Moon sensibility. The colors are beautiful and the stencil is to die for. Your execution is so excellent.
ReplyDeleteLove your colorful journal cover. Thanks for demo-ing one way to use the red rubber mat. I wasn't sure what that was for!
ReplyDelete<3 J
jwoolbright at gmail dot com
Your designs are just the type of elements I love to include in my creations.
ReplyDeleteYou are the coolest and most clever girl ever!!! How do you do all these great things, time and time again?! I know...you have TALENT! Wooot! Truly inspiring, my friend! xoxoxo
ReplyDeleteIt took me a while to be able to find the end of the Wonderful comments to post my own! Your Creativity continues to amaze me. Wonderful Tutorial so straight forward, you make it look simple! Love your use of color and the Stencil you designed in this project is So cool. The Rubbermoon Stamps were incorporated in such a fun and cool way. LOVE LOVE LOVE it KP!
ReplyDeleteOMG. I am in love. I need to do this. You are amazing.
ReplyDeleteLovely work!!! Really glad I saw this page. :)
ReplyDeleteShows that a little customization goes a long way to personalize a commercial product.
ReplyDeleteI love the cover, your stamp adds a really cool touch to the already great look with the stencil. Wonderful!
ReplyDeleteWow that's just so amazing, what a makeover, so very inspirational, no I just need to get on with it myself.
ReplyDeleteOh my Gosh this is so awesome! I have some face stamps I bet would so wonderful with this stencil. The use of acrylic spray paint is really cool as well. I've never used stencils with that medium before. Thank you for sharing.
ReplyDeleteSar Tann on FB
I have stared at Celestial Grove in the Stencil Girl line up forever wondering if I'd like it..... holy cow.. I missed the boat. Your journal cover is just fantabulous! textilerecycler (at) yahoo (dot) com
ReplyDeleteOh, I love your journal cover. I'm going to steal that idea.
ReplyDeleteThank you for your ideas.
Great cover. I love all the bright colors, and the stencils and stamps you chose. Very inspirational.
ReplyDeleteHow did I not see that face stamp on Rubbermoon??? I would have purchased it for sure! And I REALLY love the stencil used in this tutorial. W.A.N.T.
ReplyDeleteoh this is fun!
ReplyDeleteLove, love, li e your cover, I am new to this journaling art, too afraid to take the leap, but have decided 2014 is my year to lose the fear! Thank you for sharing.
ReplyDeleteLraine8268@gmail.com is unknown above, as you can see I'm a bit technology impaired as well.
ReplyDeleteSo creative and colorful! Neon is the way to start off the new year!!
ReplyDeleteI am so excited to join in the fun . . . I have never been a "journaler" but am intrigued by the artistic journal techniques and using stamps and stencils!!! Thank you so much for turning me on to this, Brenda Smoak!!!
ReplyDeleteGorgeous transformation!
ReplyDeleteCompletely inspirational! Thank you for sharing!
ReplyDeleteThis is wonderful! I can't wait to get started!
ReplyDeleteI love the journal cover! Thank you for the inspiring tutorial.
ReplyDeleteI love this technique and I'm going to try it tonight. I can't wait. Such an inspiration.
ReplyDeleteBeautiful book! I love the step by step follow through:) And Kristen...I love my Rubber Palette...so glad you had the chance to come up to St. Louis, so that I could purchase one:)
ReplyDeleteLOVE everything about this! It turned out so "purdy"! This is a really great tutorial for somebody new to this kind of crafting like me! You make it look so easy! I love the stencils & stamps & colors & all your tips! Thank you! :D
ReplyDeleteThe stencils are awesome. Great inspiration
ReplyDeleteGreat journal cover!
ReplyDeleteI like this because it is more painting than crafty. I especially enjoyed the black spray paint. That application was a surprise. It's vibrant!
ReplyDeleteThis is Carolyn Owen Sommer, it won't show my name for some reason.
DeleteLove the colors, the design wonderful cheery for a cold winter night!
ReplyDeleteI guess I've been out of the loop for a while-I didn't know Rubber Moon had stencils now! Thanks for the chance to win!
ReplyDeleteHoly Inspiration, Batman! What an exciting development!
ReplyDeleteI already commented on FB but now I'm working my way through the blog hop. I have to say that I could look at this journal page ALL DAY! It makes me swoon!
ReplyDeleteLove those bright, neon colors and how nicely they blended. Beautiful journal cover!
ReplyDeleteLove that journal page! I'm very new to art journaling, mixed media, etc. While I love the look, I still can't make my hands do it. Argh! They want to fuss everything down to look perfect and comic book outlined. (sigh) I'm still trying..
ReplyDeleteI Love your journal cover, and the stencil with stamps used!
ReplyDeleteThanks for a chance to win :)
Thanks for showing your cover make-over! It's beautiful! Now I'll need that stencil and stamps! Thanks for feeding my addiction, :)
ReplyDeletewhat a great stencil design and your cover is fabulous.
ReplyDeletestamping sue
http://stampingsueinconnecticut.blogspot.com/
I love your stenciling ideas!!
ReplyDeletelove rubber moon, kristen and stencil girls sooooooo much. the products and awesome and the projects are over the moon. thnaks for the chance to win. xoxo
ReplyDeletethankyou so much for sharing this method of painting it's just awesome when you other artist take time to share you talent with other people it is greatly appreciate I can promise you {{{{HUGS}}}} :D
ReplyDelete